Wednesday, January 27, 2010

A Post to INSPIRE...a MEMORY BOX keepsake

I originally came across this post on the Whatever Dee Dee Wants Blog. Her blog took me to a link on Martha Stewart featuring Darcy Miller who happens to be the editor for Martha Stewart Weddings. Darcy Miller's Family show was featured in the February issue of Martha and boy oh boy to be in attendance would be such as amazing experience. 


photo coutesy of Whatever Dee Dee wants blog


photo courtest of the marthablog.com

"Darcy Miller, editorial director of Martha Stewart Weddings and an avid chronicler, celebrates life's meaningful moments and turns them into charming keepsakes."

Charming is right, take a look for yourself....Below are some of my favourite memory boxes.


I was even inspired to create my very own memory box for my daughter. This past summer I took my little girl to the beach I spent every summer going to while growing up. I decided to frame her little bikini along with a picture of the beach bum herself catching some rays. It's surely a day I never want to forget so what better way to capture it forever than in a memory frame. The frame will be hung in Ashtyn's bathroom tomorrow. Wonderful!!


To see the rest of Darcy Miller's memory boxes click here. But beware you too will be heading to the store to purchase a memory frame.....Have fun!!


Monday, January 25, 2010

MMMM...a GIANT cUpCaKe...in time for VALENTINES!!


I don't know anybody who doesn't enjoy a cupcake. And certainly anybody who dislikes a GIANT cupcake...except maybe my hips. This is a perfect cake for a child's biRtHday or for a special occasion such as VALENTINES DAY! I'm gonna show ya how I made it right down to the chocolate liner.

What you will need is the 3D cupcake pan by WILTON. Now I almost had a mild heart attack when I saw the price of this pan at Michaels....$50.00 CAD. Even with my coupon it was still a lot. I think my mother in law found it at Sears for 19.99. So look around at Walmart, Sears of Target for a better price.
The directions that come with the pan are a little messed up. The top and the bottom don't cook evenly at the same time and the one pours over the side. Here's how I baked mine. I greased the pan with shortening and flour....you can use cooking spray too.  I ended up using two packs of Pilsbury Funfetti cake mix, with two cups milk, 6 eggs, 2/3 cup oil.
I filled the bottom layer of the pan with 3 1/2 cups of mix and cooked it for about 8 minutes at 325 degrees. (the botton part is larger so needs a bit more time to cook).

 I then added 3 cups to the top part of the pan and cooked both top and bottom until the cake was done....about 55 min or until a tooth pick or knife inserted comes out clean (keeping in mind every oven is different).

Allow the cake to cool for a few minutes then level the cake with a knife or the wilton leveler so both ends are flat. Remove from pan and allow to completely cool before assembling and icing.

While your waiting for the cake to cool you can make your CHOCOLATE LINER. Michaels sells many different colours of melting chocolate from pink to blue to dark brown. Be sure to wash and dry your pan before making your liner. Then follow the directions below that I found on Oh sugar Cakes Blog.


SUPPLIES:

Wilton Giant Cupcake Pan

Candy Melts (any brand)

Rubber Spatula
 
INSTRUCTIONS:

1. Melt the candy per instructions on package.

2. Pour half of melted candy into pan.

3. Tilt pan and use rubber spatula to spread candy around until all sides are evenly coated.

Gently tap pan against your work surface to remove any air bubbles. Refrigerate until firm.

4. Apply second coat and refrigerate until completely firm. (I usually wait 20-25 minutes)

5. Unmold (gently tap pan while turning upside down-it should come out easily)

6. Fill candy shell with the cake base. If you chose to bake your base using this pan you'll have to

trim the sides in order for it to fit inside the shell.
 
I added a bit of icing between the two pieces of the cake so it sticks together.
 
To ice the cake I used a Wilton 1M Star tip and just piped from the base of the cupcake to the top.... Like you would for a small cupcake. You can see I did this cupcake in the summer since the icing is a little droopy.
 
Here is the cupcake I made for my daughters birthday cake smash in November. I think it still looks nice even without the cool chocolate liner.


And the aftermath......YIKES


Tuesday, January 19, 2010

Office Chair Makover

From DRAB.......

TO FAB!!!
Here's what I did...

I went to the fabric store and purchased some thick fabric. I bought a metre which was even too much. In U.S measurements a yard is close to a metre. I cut the fabric to the size of my cushions leaving an inch or so to fold over the sides.

I then took my staple gun and started firing away.

I didn't worry so much about how it looked since it was on the botton of the seat anyways.

For the top I did things a bit different since both the front and the back of the top cushion will be visible.

I first covered the front of the cushion like I did the seat of the chair. Once that was done I took another piece of fabric and layed it over the back. I folded under the sides and ironed the edges to make them crisp and clean looking for when I stapled.

TIP- Before you staple the back fabric on just be aware of the number of screw holes instead of trying to feel around for them once the fabric is on there. I made a small hole in the fabric with my scissor end once it was stapled on so I could screw on the chair piece.

I decided to take the hideous piece of plastic off the chair part too. It just looked so cheap and nasty.
Here is the finished product. Me and this chair are gonna spend lots of time together!


POLAR BEARS-TIPS FOR TOTS TUESDAY Jan19th

If I'm teaching the children about animals I usually try to bring in real pictures of the animal so they can get an idea of what they really look like. I find google works well for this.

I then make a felt animal to show the children the different body parts of the animal. We put it together at circle as we talk about each body part.
Some facts about Polar Bears

* polar bears are carnivores they only eat meat...FISH
* Polar bears don't drink water...they only swim in it
* They have very powerful smell-- that helps them smell out the fish in the water
* They have VERY sharp teeth and claws for hunting and eating fish and seals
*Polar bears paddle with their front paws and steer with their back feet
* Polar bears have two types of fur. The botton layer keeps the bear warm and the top fur is like straws and they keep the bear from getting wet.
* Under their fur polar bears are black
* Baby polar bears are called cubs....most mommys have two cubs at a time...TWINS.

SONGS AND FELT STORIES

Roley Poley Polar Bears Song

The roley poley polar bears
Like dancing in the snow
And they don't care if they don't have a fiddle or a bow
Each takes his place and curtsies low
And smiles a gentle smile
When polar bears go dancing
They do it with great style

Polar Bear Pokey
(the same as the hokey pokey but instead use polar bear body parts)

You put your ears in
You put your claws in
You put your tail in
You put your black nose in
You put your furry body in


FIVE LITTLE BEARS


Five little bears

Heard a loud roar

One ran away

Then there were four!


Four little bears

In water to their knees

One fell in the ice

Then there were three!


Three little bears

Deciding what to do

One fell asleep

Then there were two!


Two little bears

Having lots of fun

One went home

Then there was one!


One little bear

Playing in the arctic sun

He got bored and swam for home

Then there were none!


MARCO THE POLAR BEAR
(use this poem with coloured felt fish and put them in a fabric bag for the children to pull out and identify)

Marco the Polar Bear
As white as the snow
Sat on the ice, near the cold waters flow
Lunch! I need lunch he said
I'll make a wish.
He stuck in his paw and came up with a fish!

ART

Shaving cream polar bears
Don't forget to cut out the bears using black construction paper...remember under their white fur they are black. Then have the children cover the bear with white shaving cream. Then let dry.

Ice Cube Painting

Take a piece of white paper and sprinkle a bit of powder paint on it....use any colour. For this I would put out dark and light blue.
Let your child rub an ice cube over the paper and paint and watch what happens. This is messy and fingers will get chilly but it's a great painting technique.

Styrofoam Cup Polar Bear


Cotton Ball Polar Bear


SNACK TIME
Use white bread and a bear cookie cutter to make Polar bear sandwiches. For the face of the bear use raisins for eyes and a nose.

MY FAV POLAR BEAR BOOKS
(photos courtesy of amazon.com)

Polar Bear What Do You Hear-Eric Carle

The Polar Bear Paddle- David Bedford


The Three Snow Bears- Jan Brett
Dear Polar Bear-Barry Ablett


Sunday, January 17, 2010

TILE COASTERS


I've been seeing tile coasters on a lot of craft blogs lately so I thought I would make some for my mom. I know there is already so many tutorials out there but I wanted to share mine in case you haven't seen any of the others before. They were very easy and VERY cheap to make. Best of all my mom loved them and I have some family requests for more.

SUPPLIES

Tiles found at any home improvement store
Paper or napkins (I made mine using scrapbook paper)
Mod podge
Cork or felt tabs for the bottom on the tile
Glaze

INSTRUCTIONS

Mod Podge your paper onto your tiles and let it dry.

Put a few coats of Mod Podge over the paper and tile to seal the paper onto the tile. I did three coats.

Once the Mod Podge is fully dry, spray or paint the glaze over top of the entire surface of the tile. I did three coats of this as well to seal it all in well. I probably went overboard with my coats but once again my crafting OCD got the best of me....
Once everything is completely dry, glue some cork or felt circles onto the back of your coasters to help prevent scratching your table top. I found my roll of cork at Home depot.
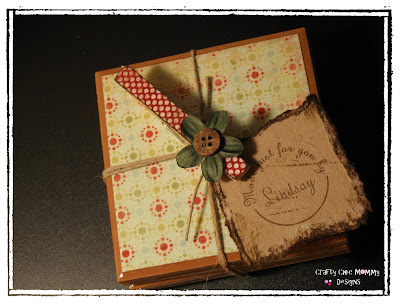
Package them up with a piece of ribbon or twine, and watch your recipients eyes light up. Don't forget to make a set for yourself.


Tuesday, January 12, 2010

My New Craft Space and a Chic Magnetic Board

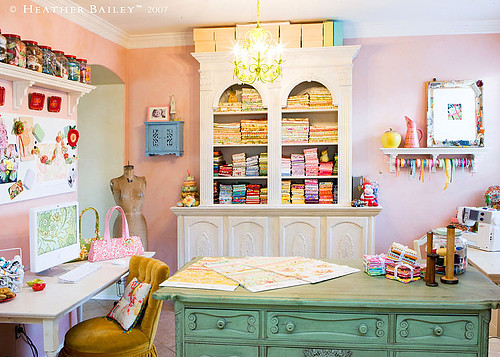
So like I mentioned in a previous post, I'm working on decorating my craft area. It's not as AMAZING as these....(get ready to swoon ladies)


However, it's my cozy little spot where I can whisk away and CREATE to my hearts content.

 I was so happy with our framed magnetic message board  that I featured in a previous post that I knew I had to have one in my craft space. I decided I would pretty mine up a bit by hot gluing glass rocks onto the frame...which was 5 dollars at the dollar store.

I then added the sheet metal behind the frame matting and personalized it with my initials using vinyl. Oh and can I just add that this was the first time I used my Cricut that I got for Christmas and I know I'm already ADDICTED.


To hang my board I stapled some ribbon onto the back and hung it on a coat hook. Now I have to make some fun magnets for my board. I'm thinking I might use some pink buttons.

Here are some pics of my CRAFT AREA. The next thing I need is a better chair or re cover that ugly one. I feel another project coming on.....


Related Posts with Thumbnails