

Last weekend our family went out for breakfast. Gone are the days of relaxing conversation over a fresh cup of coffee and eggs benny.....we have a toddler people. Basically we're chugging our coffee to keep it from being spilt and gobbling our food as fast as we can to get the heck out of the place.
Life must go on and we still want to enjoy the odd dining out so I decided to make Ashtyn a crayon cozy to help keep her entertained.
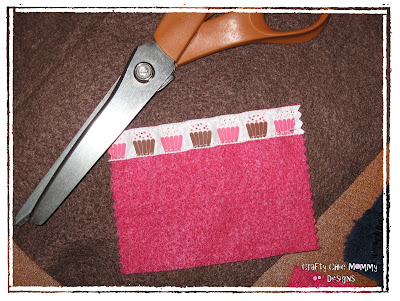
Since I have so much felt left over from my felt play house I decided to use that for the material. Really in the end it was a better choice for me since I didn't have to worry about finishing the edges.
What you'll need
Two pieces of felt
Ribbon
Pinking Shears
Crayons
Pad of paper


Two pieces of felt
Ribbon
Pinking Shears
Crayons
Pad of paper

1. Cut out two pieces of felt. When deciding what size make sure to factor in how many crayons you want your cozy to hold and how big your pad of paper is. My cozy is 5 inches by 9 inches in size.
2. Next cut out a piece of felt to hold your crayons. I wanted my cozy to hold four crayons so I cut it 4 iches by 3 inches.
3. Sew a piece of ribbon along the top to prevent the felt from stretching when the crayons are put in and out of their pockets. Take your pinking shears and pink down the sides for a nice decorative touch. Note: I figured doing this would prevent my ribbon from fraying but this wasnt so, in the end I ended up using a match to seal the ribbon ends a bit.

4. Next sew your crayon pocket onto the felt backing. I started by sewing a straight line down the middle (backstitching for reinforcement) and then working my way to the sides to make the pockets for the crayons. I left a 1 inch space between each line to hold the crayons comfortably. I used a piece of tape to show me where I needed to sew.

5. Sew around the sides and the bottom of the felt pocket to secure it to the big piece of felt.

6. Cut another piece of felt that will snuggly hold a small pad of paper. I found some cute little pads of paper at Michaels with the cardboard backs on them to easily slide behind the felt pocket.
Sew down both sides of the felt leaving the bottom and top open.

7. I decided to put my logo on this project using this printer friendly cotton that I purchased at Michaels. The cotton has a hard removable backing on it to allow it to be used like normal paper in a printer.

 8. Now that the note and crayon pockets are sewn on it's time to sew the front and back pieces of felt together. Pink around the edges first then slip a piece of ribbon at the edge of each side to allow the cozy to tie together.


9. Thats it...your done. Now fill it with crayons, paper and a few stickers and pop it into your purse for the next visit to the doctors office or breakfast rendevous.


I'm linking this to


That is such a cute idea! And it looks fast and easy...something great for some birthday's I have coming up! :)
ReplyDeleteI featured you this week on Thursday's Treasures! Go ahead and grab a button! Thank you so much for sharing! Don't forget to come back this week too!
ReplyDeleteI just did this project and it was so fun. I am not the best craftier but your tutorial was easy to follow. I just posted about my finished project at http://joekaylyn-littlefamily.blogspot.com/2010/04/crafty-week.html. Thanks again. So cute and fun.
ReplyDeleteTHanks so much for the tute! This is the CUTEST one I've seen yet and just had to make one this morning. I posted mine and added your link :) check it out if you'd like:
ReplyDeletemiamoodesigns.blogspot.com
I love the way this turned out. My girls would love to have something like this to carry around. They love little purse type things and have to be drawing all the time:)
ReplyDeleteI just became a follower and I grabbed your button! Thanks,
Amber
LoVe this! I need to make some of these for my kiddos for our long rides to Grandma's! They would love them! I featured these and your cute felt bracelets here:
ReplyDeletehttp://thecreativecrate.blogspot.com/2010/06/fun-felt-summer-projects.html
Thanks so much for sharing! :)
love this idea! I will be making one of these for my son.
ReplyDeleteDid you know that rather than spending money on the printer ready cotton sheets, you can cut a piece of cotton to 8.5" by whatever length (11 or 14) and iron on freezer paper cut to the same size as your fabric(shiny side to wrong side of fabric ie-back of fabric)and feed it through the printer that way. It works every time.
To help set the ink, after peeling off the freezer paper, fold it shiny sides in half and put it on the top of the fabric and run your iron over the freezer paper and print. It helps seal it.
Hope that made sense :o)
Wow! Very cute. I will be trying this soon...I have two toddler people and I know exactly what you mean about chugging the coffee and shoving the food down your throat! :) Have a great day! (Linked over from The Creative Crate.)
ReplyDelete