Thursday, September 23, 2010

MY PuMPkin PaTCH LaWN STaKe

I'll come clean and admit that I'm a Craftaholic this week!!

Here's how I made this sign...

I cut four pieces of wood and sanded the rough edges
* the post is 42 inches
* the sign on top is 16.5 inches
* the two direction signs are both 15 inches


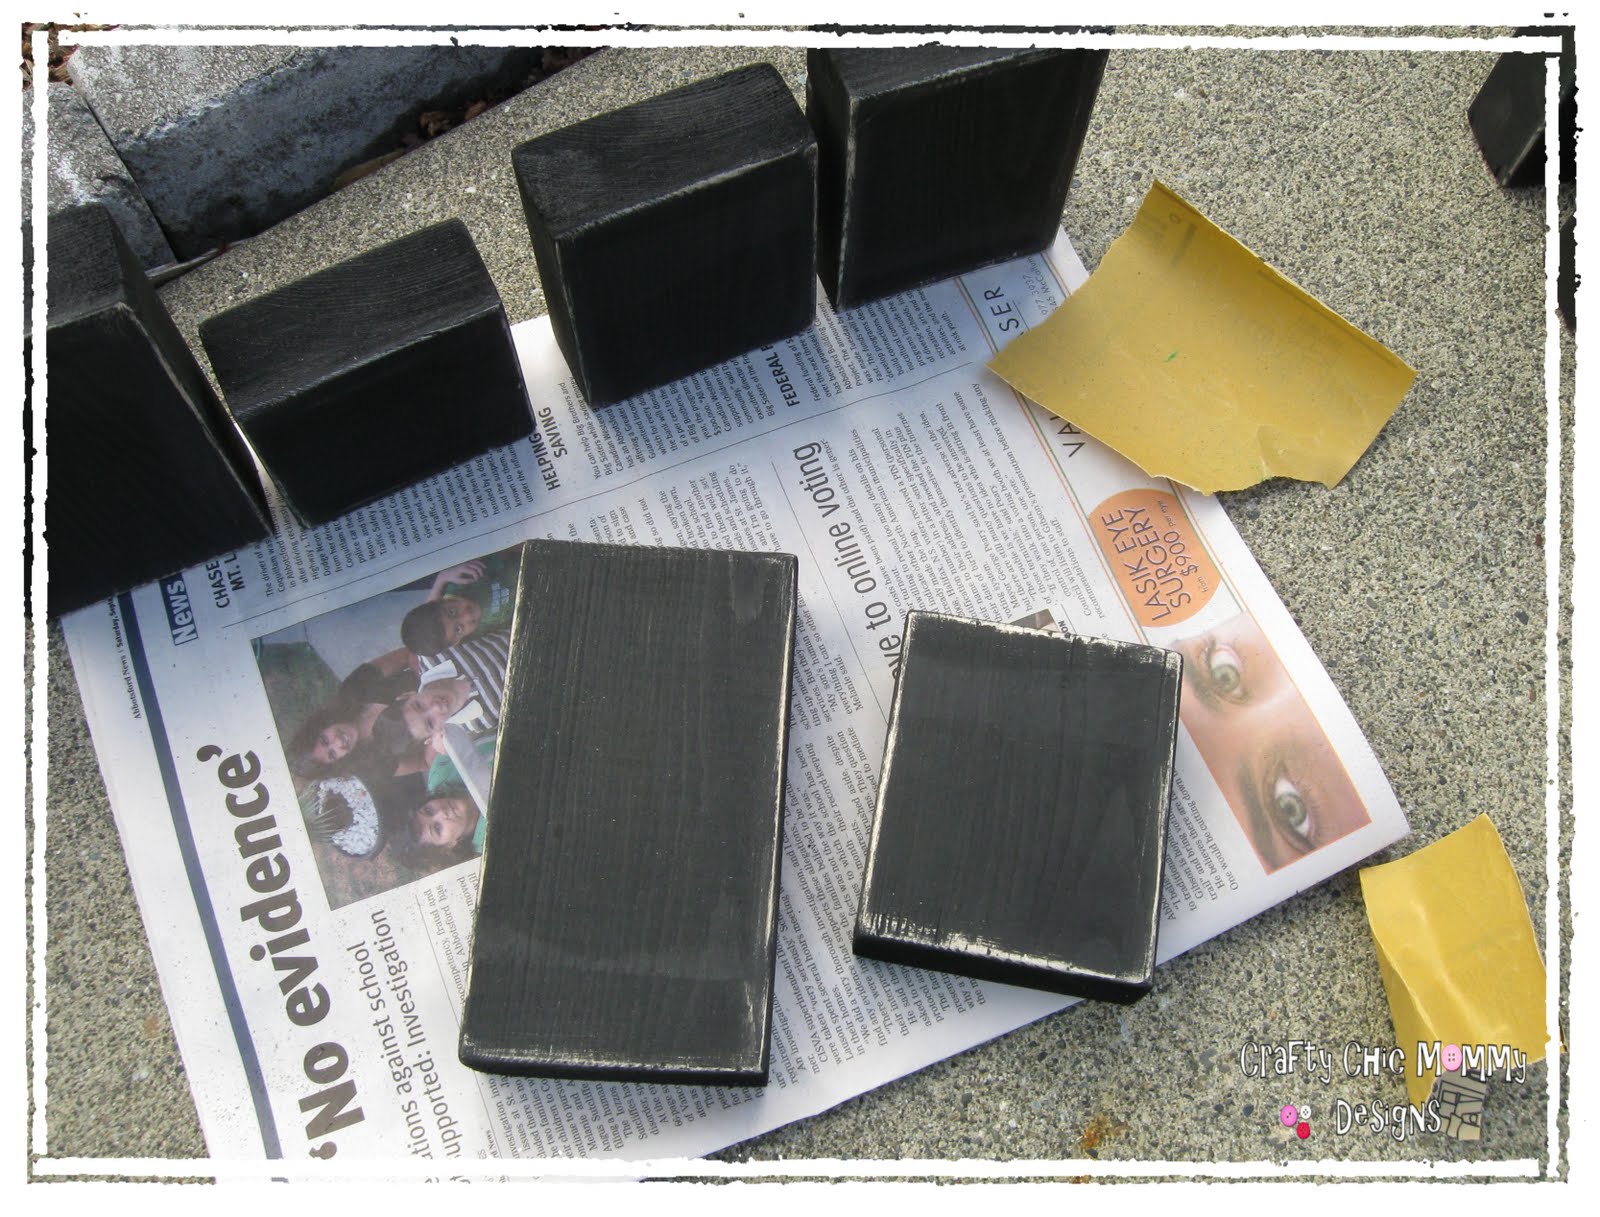
I painted all the pieces using Ceramcoat Acrylic paint from Michaels. Since this is going to be beside my door and out of the rain I didn't bother using outdoor paint.


Once completely dry I roughed up the edges....have I told you lately how much I love the worn look


I used my Cricut and Sure Cuts Alot Software to make my lettering


FONTS I USED FOUND IN MICROSOFT OFFICE!!!

Pumpkin Patch = Grilled Cheese
Hay Ride = Smarty Pants
Corn Maze = Hank

 For this project I used the outdoor glossy vinyl because it holds up better and is intended for outdoor use.


I affixed each sign onto the post using Wood Glue

For a special touch I tied a piece of Raffia to the top and placed it next to my front door for all to see.


Happy FALL Everyone!!


I'm linking this project to....


Show and Tell @ Blue Cricket Design
Perpetual Link Party @ Childmade
A Crafty-Soiree @ Katies Nesting Spot
Fall Frenzy @ Diary of a Craftaholic
Everything But the Kitchen Sink @ A Little Knick Knack

CRICUT CAKE GIVEAWAY...


Now that I have your undivided attention I wanted to share a little secret with ya. 

Tomorrow { Friday Sept 24th } Today's Creative Blog is giving away a CRICUT CAKE machine. That wonderful little machine that has taken the craft world by storm now cuts fondant. Now anyone can create professional looking cakes, cupcake and cookies with the help of Cricut Cake!!!

Friday, September 17, 2010

WoODen PUmpKins


I made these wooden pumpkins with the left over scrap from my  Family blocks. Again they were easy and cheap to make which is my kinda craft...

Here's what I did

#1 First I cut my wood in varying sizes and sanded the corners at the top. I also cut smaller pieces for the pumpkin stems and then sanded all my wood.
#2 I added some dimension to the pumpkins by sawing some lines down the front.


#3 Next I painted the pumpkins orange and stems brown. Can I just admit that it took me three coats of orange paint to get the colour I wanted....In the end I used Ceramcoat Acrylic paint in the colour Terra Cotta. When I make two more sets this weekend it should go a lot faster!!

#4 Once completely dry I took my sandpaper and roughed up the edges. I love the distressed look.


Tuesday, September 14, 2010

Vinyl Block Letters

Everytime my mom comes to visit me I prepare a craft for us to do during her stay. This visit we made vinyled block letters. Remember I'm on a huge vinyl kick right now after my Sure Cuts Along purchase. This craft is obviously fairly easy to make but here are my step by step directions and pics. Also can I just say that this project costs almost next to nothing to make once you have
some of the big costs out of the way...like the Cricut machine.

1. Purchase an unfinished 2 x 4 piece of wood from Home Depot or any other home improvement store. A huge piece cost me $2.

2. Cut your wood into desired heights. I wanted my blocks all sizes.

3. Sand your wood

4. Stain or paint your wood. We used black acrylic paint.

5. While your wood is drying choose the scrapbook paper for
your blocks. Note*** Instead of just cutting the paper for the blocks we ripped it with a ruler to create more of a rough, less perfect looking effect.

6. Once blocks are completely dry, sand the edges a bit to give them a worn distressed edge.

7. Using Mod Podge glue your scrapbook paper onto your blocks.

8. Almost Done!!! Put your vinyl letters on each block. And if you choose, you can embellish with buttons, ribbons etc. We used a button to dot the "i".


Here's how ours turned out!! Tomorrow I might start working on a set that says "Harvest" Or "Give Thanks".


Saturday, September 11, 2010

The CRICUT needs some LoViN too!!

Hmmmm....what else can I vinyl tonight??
MY CRICUT!!!
I told my husband if one day he sees that our sock drawers are labelled in vinyl that he needs to get me some help.....and fast!!


Jazz up those Canisters!!

Last Christmas I got a Cricut....wahoo. A few days ago I purchased Sure Cuts A Lot software to use with my Cricut....double wahoo. After figuring it out and becoming familiar with it I'm thinking why didn't I buy this program sooner?? No need for more expensive cartridges. This program enables you to cut ANYTHING you want on your cricut using ALL the fonts on your computer and any shape you find on your computer. There are also tonnes of websites and blogs that you can download free shapes from. You must check out scrapping table to purchase your SCAL while it's on sale.  With that sale you get a bunch of free awesome shapes along with it.

Ok onto the project right???

So tonight I used my Cricut and SCAL software to jazz up my baking canisters. I used to have these boring old laminated ones I made years ago...
Pretty dorky right??
Well here are my new vinyl ones....a lot nicer I must say so myself.


Oh and can I just state that I'm not crazy putting the icing sugar wording on the chocolate chip canister. That is actually home to the icing sugar when I buy some more....as for the chocolate chips??? They go in my tummy!!!

Related Posts with Thumbnails